混沌百手是南方公园:完整破碎的一个主线任务。
简介
准备好面对南方公园有史以来的第一位超级反派:混沌教授!
攻略
逃出家中
在第一晚的逃逸行动之后,房子的封锁做得更加彻底了,不仅有三个门锁锁着门边和锁链,还有两个上面和中间的插销将大门锁住。而且还用了木板将门钉住。
这次的行动比较长一点,要解开这个门,需要金挂锁钥匙(Gold Padlock Key),银挂锁钥匙(Silver Padlock Key)和铜挂锁钥匙(Copper Padlock Key)。金钥匙在地下室门旁边的架子上,用摔炮即可将其打下。银钥匙在沙发正中间,但却被一团带电的水挡住了,用时空暂停即可安全拿走。而铜钥匙就在厨房里,父亲的手上,直接拿走即可。
用钥匙即可打开三个门锁,用摔炮打开插销,至于那木板,并不能阻止往外开的门。
做完了这些事,门就打开了,开门走向新的冒险吧。
到达“由你存”
工具侠出现在门边,他从旁边的灌木丛跳出来,秀了几下他的动作,就带着新来的和他所自认为的责任去往仓库。在路上,他一边走一边说他的背景起源故事,也就是幼年的一场风暴意外让他获得了超能力,又同时让他父亲精神残缺——很快走到马什家,兰迪又一次在划刻自己家车的行为很好的证明了他精神有多残。工具侠告诉新来的,这种愚蠢似乎愈演愈烈,并且表示自己打击犯罪的动力,也许就是来自多年以前,没来得及拯救父亲的愧疚。
继续前进,就会抵达肯尼的家,又称“神秘侠之家”,他讲完了自己的背景故事,又问了一句新小孩的背景故事,没有得到回应后,他便认为是某种很悲剧的故事,决定不继续深问了。如果闲的无聊,可以去右边看看毛巾巾和一位顾客的“交易”,用摔炮和屁都可以让他们停止“交易流程”,急忙离开现场。没什么好事干了,就和工具侠一起来到房子窗口边,互动即可看到工具侠去掉挡路的木板,让两人进了房子。
进入麦考密克家,可以立刻用摔炮打击墙上的BEER标志,会掉出高等神器抗压荧棒(Fuse of High Tolerance),往左边走可以进入厨房,右上角的柜子里放着通心粉(Macaroni)x1,冰箱门可以打开,但也没什么用。离开厨房,继续向更深的房间前进,可以听到肯尼的父母在争吵,因而左边离进走廊最远的房间是不能进入的,左边离得最近的门是卡伦和凯文的房间,左边的柜子里有星童二件套装(Starchild Costume)的配方,包括头带和衣装,以及布料x1,杂物x10,右边的墙上贴着一张耽美画作欢迎回家(Happy Return)。
搜刮完毕,前去右边的肯尼的房间,床脚的箱子里放着杂物x15,床头柜里放着神秘侠的角色卡和杂物x10,接着就可以进入衣柜里了。衣柜的红色按钮一按就可以打开神秘侠的秘密通道,通往肯尼家的后院。不过在过去之前,可以用用摔炮可以打碎左上角的裂缝,拿走一份有点粗糙的猫尿试管。
后院里有一个烧烤架,下面有一个燃料罐,把烧烤架连着燃料罐拖到围栏明显是补丁的部分,再用摔炮和屁炸掉它,就可以走到围栏后面打开箱子,拿走装饰疤伤(Scar Wound)和布料x1,而被搬开的燃料后面的袋子也可以搜刮,里面放着生物危害x20。
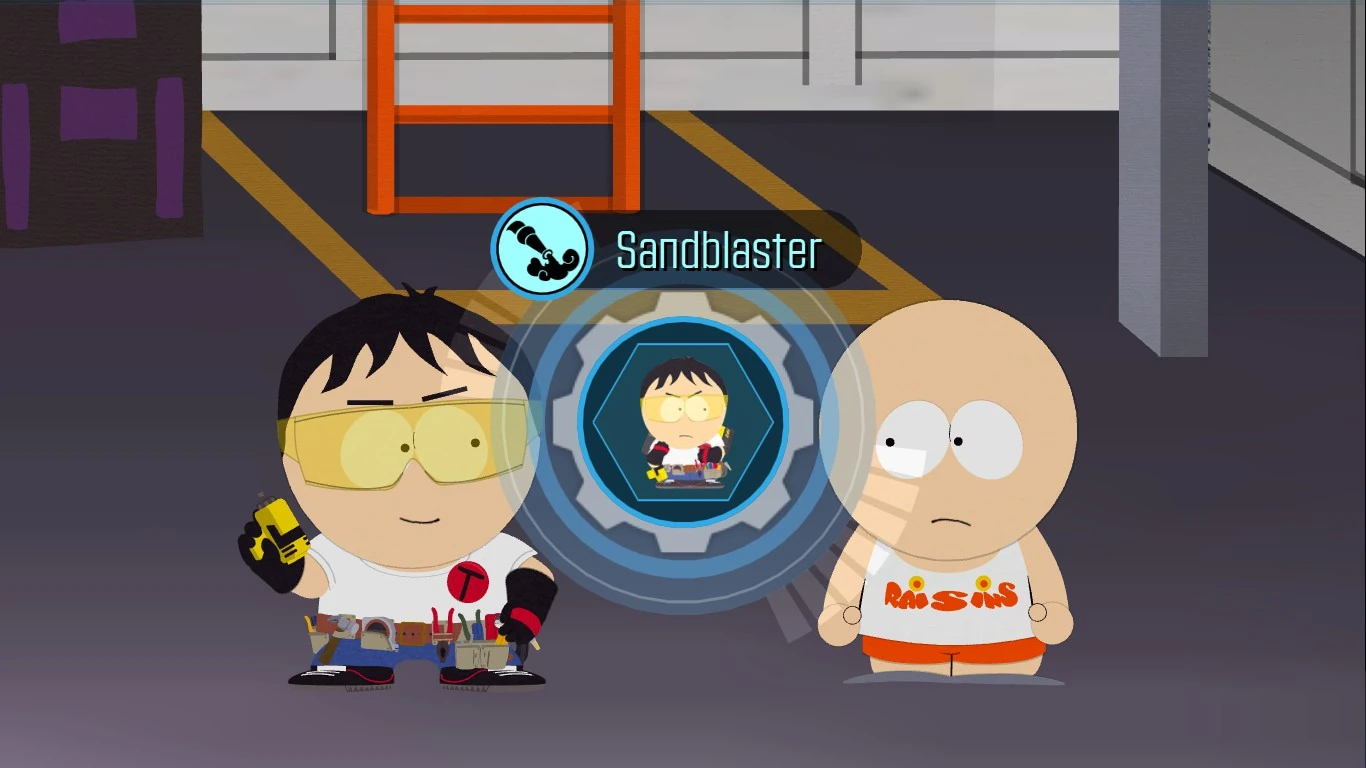
来到右边,工具侠表示自己可以对新来的展示他的喷砂器超能力了,为他打开空气压缩机,就可以看到他用喷砂器吹走洞口的岩浆,围栏上的小洞就可以走过去了。
小洞的另一边是南园南公寓的遗迹,进入高楼底层看不见的角落,可以获得生物危害x10。继续往左走,就可以看到一群流浪汉,他们挡住了左边的纸箱秘密通道,由于工具侠没能用强硬的外交手段开路,就只能用更强硬的力度钻过去了!
战斗:南园南遗迹的流浪汉
战斗的两边各有一组一样的敌人:一个力士,每回合移动一格生命260,有一个造成68伤害的近距攻击;一个小兵,生命130,每回合移动两格,有一个造成36伤害,流血状态的刺伤攻击。
这场战斗并不困难,算是工具侠的试手战斗,而且在战斗之前用屁炸掉用于取暖的油桶,带走两个敌人一半的生命,甚至还能让它变得更容易。
工具侠的超远程攻击技能非常适合这场战斗,他如果专注一名敌人,可以让敌人每一次被击退,一直留在对面动弹不得,可以运用地上的垃圾稍稍防御一下,但总体来说一直造成伤害即可。
胜利之后,即可获得75xp,次等神器神爽烟罐(Sanity Siphon)和DNA原始侵略性(Primal Aggression)
在前进之前,可以先停下来,在棕色的帐篷里找到一幅耽美画作与特维克舌吻(Tongue in Tweek),左下角的纸包里放着食物x10,粉色的沙发夹层和垃圾桶里都放着生物危害x10,除此之外,这个地方到处都是零钱,可以捡一捡。穿过纸箱通道就会到废弃的南方公园火车站,再继续往北走,就是“由你存”仓库了。
混沌教授现身!
浣熊侠从黑暗中跳到了门口的一辆车上,一声令下,浣熊侠联盟随之集结。看到这番场景,工具侠不高兴地说他只打算帮新来的,帮助的计划里没有包括帮助浣熊侠联盟,不过浣熊侠反驳道,新来的属于浣熊侠联盟,因此新小孩的行动与浣熊侠联盟的行动是一体的。没办法,工具侠启动了自己的喷砂器,将仓库门口的岩浆吹走了。清理了岩浆,众人便能够进入仓库了。浣熊侠告诉工具侠他绝不信任后者,但工具侠也不甘示弱,告诉浣熊侠,这次帮忙不过是看在新小孩的面子上罢了。
和薄荷河马与法贡西尼餐厅不同,“有你存”是一个可以深入的大地图,并且由于剧情原因,在完成任务,离开这一地带后,就将无法再踏入此地,所以原则上,这里面的一切可收集品错过就再也没有了。
进入了“有你存”内部,可以四处走动,砸几个箱子获取杂物和科技产品,但比较主要的,办公室的左边有一个放着胶带x1,杂物x15的包,而最右边放着另一个包,里面有胶带x1,科技产品x5。最右边有两个仓库,目前能打开的那个里面放着的东西相当有艺术性,有一包焰火在中间,而且一个巨大的钟和一个右边的黑箱子上都有红色的裂纹,先把焰火拖到最右边,点火炸掉,可以拿到布料x5,再用时空回溯将焰火包变回来,放到大钟旁边炸掉。大钟没了就可以移动梯子了,先把梯子搬到左边去,就可以在右边箱子里找到铅笔胡(Pencil Stache),杂物x15。爬上现在已经到了左边的梯子,架子上左边的箱子里有次等神器永续摆针(Continuum Enforcer)和杂物x10。办公室里面一进门就会开灯,用摔炮可以将“有你存”后室钥匙(U-Stor-It Back Room Key)打下来,而钥匙下面的包里有胶带x2,杂物x10。用钥匙进后室,可以从左边的柜子里获得服装冠军衣装(Champion Suit)。
走回仓库的内部,调查地上闪亮的银色面具,工具侠意识到新来的发现了什么,但在意识到具体发生的事情之前,“有你存”的大门关上了,原本安静的仓库灯光四起,巨大的屏幕上出现了混沌教授的脸。他告诉众人,他被人花了两万美元雇来保护这里,并且决定消灭浣熊联盟(浣熊侠赶紧纠正是浣熊侠联盟),说罢便打开了仓库门,里面涌出了许多的混沌部下......不过鉴于它们都是仓鼠,战斗的效果并不好,混沌教授也在尴尬下关掉了屏幕。
从来就不存在的威胁解除了,现在可以从仓鼠们出来的仓库进入,再从这个仓库旁边的破洞出来,继续向右前进。下一块有一个锅炉挡住了路,用糖尿病之怒即可推倒,工具侠还觉得队长把锅炉推到路上不太靠谱,但接下来就可以用时空回溯将其恢复原状,这让工具侠相当惊讶,还表示自己的超能力也不差。这一场景里有一个包,放着胶带x1,杂物x10。继续前进,可以看到工具侠、风筝侠和浣熊侠排成一排在中间,中间又有一个银色面具。
拿起面具,混沌教授又一次出现在了许多大屏幕上,他告诉众人,他的两万美元全都派上了用场,他的部下可不只是那些仓鼠。说罢便打开了几个仓库门,里面涌出了混沌小孩和混沌狗,这场战斗可就不是那么容易就能过去的了!
战斗:混沌部下
混沌小孩有三位,左右上都有一个,声称的职业略为奇怪,包括巫师,掷亡等等,但本质而言,上面和右边的都是射手,有180生命,每回合移动一格,直线投掷攻击造成80伤害,而左边的是投弹手,生命240,在距离两格的位置投掷岩浆,造成80伤害,不造成燃烧。左右的两只狗有180生命,每回合移动两格,近距离攻击有120伤害。
注意工具侠将作为锁定角色参战,所以不能替换掉。这场战斗可以运用卡角度来避免受伤,让工具侠的多角度攻击发挥作用,如果敌人站成一排,神钻手大有好处,可以产生击退伤害。也可以用糖尿病队长的迟缓效果来让大部分敌人动弹不得,不过在这之中可以多关注一下狗,因为它们的伤害不太好忽视。由于不需要考虑燃烧效果,这一场战斗在正常难度相当简单,击败全部的敌人即可继续。
第一波敌人解决之后,混沌教授又派出了他从未让世人见过的低工资战力:墨西哥混沌部下,同时又一次叫错了浣熊侠联盟浣熊侠明显又一次生气了。
墨西哥混沌部下的生命更多,但每个都只能每回合移动一格,狙击手有180生命,远程攻击造成80伤害,力士有360生命,造成120伤害,右边有狙击手和力士各一名,上方有一位狙击手,而左边有两位力士。
可以基本用一样的策略进行战斗,站成一排的效果拔群,这么做基本只有一个人可能收到伤害,都是一格移动意味着他们减速之后就不能动了。
战斗完成之后,可以获得75xp,杂物x5,以及约$1.75。战斗完毕之后可以从上方的仓库里面找到一个包,里面放着Cloth Eye Mask装饰品。拿到这个之后,就可以继续向右前进了。
这个仓库里有一个机枪在守着,可以用时间暂停到枪下面的开关,把它关掉。在继续前进之前可以在最左边像爬楼梯一样上到车顶,打开上面的箱子获得服装荒原二件套装(Wasteland Suit),包括衣装和有色镜,还有布料x1。接着下去,将车后轮旁边的TNT炸药搬到右边有裂纹的铁板处,用摔炮炸掉它,就可以继续向右前进了。
下一个场景满地都是破盒子,可以砸开拿点食物,左边的桶里有$0.32和科技产品x5。接着扫描小风车,用屁酷飞过围墙,到一个仓库门的顶上,目前还没有任何东西,走到右边,从梯子下去一层,打一下梯子,就可以让梯子掉下去,然后再爬下去开仓库门。仓库门一被打开,里面满满的东西就会溢出来,掉在门口的箱子里有次等神器深渊闹钟(Abyssal Timepiece)的配方,还有布料x1,胶水x1,科技产品x15。接着从右边的梯子往上爬,用时空回溯恢复梯子,再爬上去,就可以在左边掉出来的箱子里找到化妆Face Tendrils和布料x1。用刚刚的方法下来,继续往右走,有一个路口被岩浆堵住了,路口右边的桶里可以找到胶带x1,杂物x5。用时空暂停还可以在路口另一边搜刮一个包,得到胶水x1,科技产品x10。但被岩浆挡住就是过不去,继续往右走吧。
下一个场景,超级克雷格站在一辆卡车旁边,靠近他时,他很不理解混沌教授把卡车全用铝箔包裹的操作,但电话女侠从屋顶出现,想让下面的众人把焦点转到重要的事情上,不过浣熊侠反倒更关注电话女侠的身份和目的。电话女侠对新来的述说了调查的情况,意大利餐厅里的黑手党果然不过是巨大犯罪集团的一部分,她还知道56-D仓库里面有些东西,还给了新来的一部手机,便于联系。浣熊侠全程都很不乐意看到电话女侠的出现,但最终也没有得到任何的回复。
往右走可以看到一个自动贩售机,旁边有一个装着丰富解药和食物x5的包,自动贩售机里除了特制奶酪饼和回生药剂以外,还有卖高等神器混淆听仪(Aural Disruptor),可以作为收集花$7.00购买一个。
继续向右走,地上有不少装着杂物的箱子,工具侠站在一团岩浆前面,说他没有空气压缩机就无法吹走岩浆,上面的浣熊侠为此嘲讽了工具侠极其受限的超能力,并扔了个箱子下来当垫脚石,工具侠则骂了回去。先把这个箱子放到左边的箱子空缺中间,用它走到顶端的包旁边,就可以搜刮里面的极限回生药剂,布料x3和$3.50了。接着再下来把箱子搬到右边的空缺,就可以直接从另一边走过去,不用考虑岩浆的影响。在这个地方的最右下角有个有裂缝的垃圾桶,打破就可以拿到胶带x1,生物危害x20。拿完了东西,就可以进入卷帘后的装卸区了。
无序将军
大家一进库门,退路就被一团岩浆堵住了,同时一阵笑声传来,原来是装卸区的领导者:无序将军,浣熊侠联盟想进攻,但无序将军控制着上方的机械手,倒下了一堆岩浆在地上,然后便叫下了他的混沌部下参与战斗。
战斗:无序将军
战斗开始的时候,对面有一个混沌力士,360生命,一格移动,近距离攻击120伤害,一位小狙击手,生命240,一格移动,远程80伤害;一个混沌小兵,180生命,近距离攻击120伤害。而无序将军有580生命,每回合可以移动四格,非常灵活,有一个远程攻击,造成52伤害,只要不使用远程攻击,他几乎每个回合都会控制机械手从上面放下一大堆岩浆,没有攻击伤害,但是碰到的会立刻附加燃烧状态。
General Disarray will primarily use his Robo Arm attack, whereby he will control a mechanized claw carrying a bag of "lava". Once he has initiated the attack, a real-time event timer bar will appear. Once the bar is filled, the "lava" will be poured to the ground, affecting a 5-tile cross shape area.
The best way to defeat General Disarray is by isolating him away from his Chaos minions. Use The Coon's Coon Pounce or Coon Lunge (he will be selected as a party member for the battle by default) to bring him out to an open area of the battlefield. He will proceed to call in more Chaos minions into the battlefield, but ignore the minions as much as possible while focusing all attacks on General Disarray. If possible, whenever General Disarray prepares to launch his Robo Arm attack, use Timefart Glitch to stop the attack from happening.
在部下紧缺,自己也受到伤害的时候,无序将军会再召唤两个混沌小兵,和之前的都没有什么区别。
When General Disarray's health bar drops to around half of its level, he will proceed to summon a Mecha Minion. Continue ignoring the minions while focusing all attacks on General Disarray.
Once General Disarray is defeated, you will be rewarded with the Diabolic Inscription artifact and The Ginger Sense DNA slot.
A cut scene will then play, whereby The Coon angrily destroys the remote held by General Disarray, resulting the robotic arms carrying the "lava" to malfunction and spill the "lava" everywhere on the floor. Super Craig is then seen trapped between the "lava"; with no way to rescue him, the group seems hopeless, while Super Craig is seen resigned to his fate.
Once the cut scene ends, open up Inspection Mode. Move the cursor to the "lava" pile in front of Super Craig, then scan the "lava" pile. The Buddy Power hologram will then appear, make your way to it and interact with it. Toolshed will then make his way to the "lava" pile, whereby The New Kid proceeds to take the hose of his sandblaster and plugs it to the buttocks. Activate the button prompts appearing on screen (move the left control stick to the left and the right control stick to the right for Xbox and Playstation; hold A key and Right arrow key for PC by default); The New Kid will then unleash a powerful fart that blasts the "lava" pile away, knocking back Super Craig at the same time.
Sandblaster unlocked as a Buddy Power.
A short cut scene will ensue, whereby The Coon rushes to Super Craig and proceeds to give him an injection; Super Craig angrily reacts in return. After the cutscene, Toolshed acknowledges The New Kid's anal powers; a new Buddy Ability will then be unlocked: Sandblaster.

General Disarray being detained by Captain Diabetes and Mosquito after being defeated.
After that, you'll be returned to field of play where Human Kite can be seen up a ladder. You can proceed with him up the ladder, where you will be led to the roof of the warehouse, where a water tower is located, guarded by a Chaos Kid who proceeds to pour "lava" to block the path.
A Chaos Kid guarding the water tower above the warehouse where General Disarray is encountered.
To take the Chaos Kid down, use Snap N Pops at the top plank to make him fall down to the ground. Next, break the plank on the top right corner with Snap N Pops to make the plank drop down. After that, break the left corner of the plank with Snap N Pops to make the plank drop down to the ground. If you wrongly break any of the planks, you can use Timefart Glitch to rewind the planks back to its original positions. Proceed to clear the "lava" blockade with the Sandblaster ability, then make your way up to the water tower via the broken planks. Head to the hologram at the top, whereby Human Kite and The New Kid will Fartkour back to the area where the scaffolding and "lava" pile is.
You will end up at the roof of the warehouses at the area. Loot the containers at the area and also the bags near the pile of containers at the left end; one of the bags contains an Enriched Antidote. Interact with the ladder on the bottom corner and make your way down. Once you've reached the ground, Call Girl will then show up, asking The New Kid if anything can be done about the "lava" blockade. Use the Sandblaster ability to clear the blockade, then proceed through the path; loot the bag at the far end along the way.
There's also the option of not following Human Kite up the ladder. From the warehouse where you battled with General Disarray, use Sandblaster to clear the "lava" path blocking the warehouse entrance. Make your way out to the area where The Coon dropped a box for you to bypass the "lava" pile earlier in the mission. You can now use your Sandblaster to clear the "lava" blockade away. Head to the left back to the area where the truck wrapped in aluminium foil is placed. The area will always have a group of Chaos minions awaiting next to the truck; you can take them on or escape the area by stunning them with Snap N Pops or by farting on them. You will then reach the area where the scaffolding and "lava" pile is. Human Kite will proceed to make a post to Coonstagram, whereby he informs The New Kid that it's fine if The New Kid doesn't want to follow him up the roof.
Once leaving the area, you will be at another area of warehouses. Get inside the very first warehouse door seen at the area, you will be inside the warehouse where some belongings of the South Park Gazette reporter is stored. There will be a moat of electrified water blocking the way to the chest located behind it. Activate Timefart Pause to cross the moat, then loot the chest to obtain the Trinity of Reflection artifact. Leave the warehouse afterwards.
Back outside, proceed leftwards, looting any containers and breaking any boxes along the way. You will then encounter a group of Chaos minions standing next to a truck, which has a ladder and a bag on top of it. You can take the Chaos minions head on, or use Timefart Pause to loot the bag first and stun the Chaos minions to escape them. Keep heading leftwards to exit the area.
You will then enter another area of warehouses, whereby The Coon and Super Craig is seen standing outside. Before interacting with the warehouse door, loot the bag hidden behind a stack of containers where Super Craig is standing. Proceed to interact with the warehouse door afterwards.
猫咪的所在
A cut scene will then play, whereby the warehouse is revealed to be a lab where some bums are making drugs (known as 'cheese') with some cats strapped onto slings. The Coon will proceed to ask where Scrambles is; one of the bums mentions Scrambles will be sent to the boss man itself, another bum will then retort saying that they're not allowed to speak about him. The bums will then proceed to attack you, you will have to stand your ground against them.
Battle: Meth Heads of U-Stor-It
There will be four Meth Heads to take on; the battle area will be surrounded by explosive drums. Note that Toolshed is a locked party member for the battle; you can make use of his Spiral Power and Drillslinger ability to clear the explosive drums. Halfway through the battle, Call Girl will show up to fight; she will be unlocked as a Combat Buddy from this point on. With Call Girl, make use of her Phone Destroyer ability to attack the Meth Heads as well as clear any explosive drums remaining. If the Meth Heads are positioned close to the explosive drums, use the explosive drums to your advantage, where they will be knocked back by the drums when exploded. Use any of your attacks on the Meth Heads, they are relatively easy to beat.
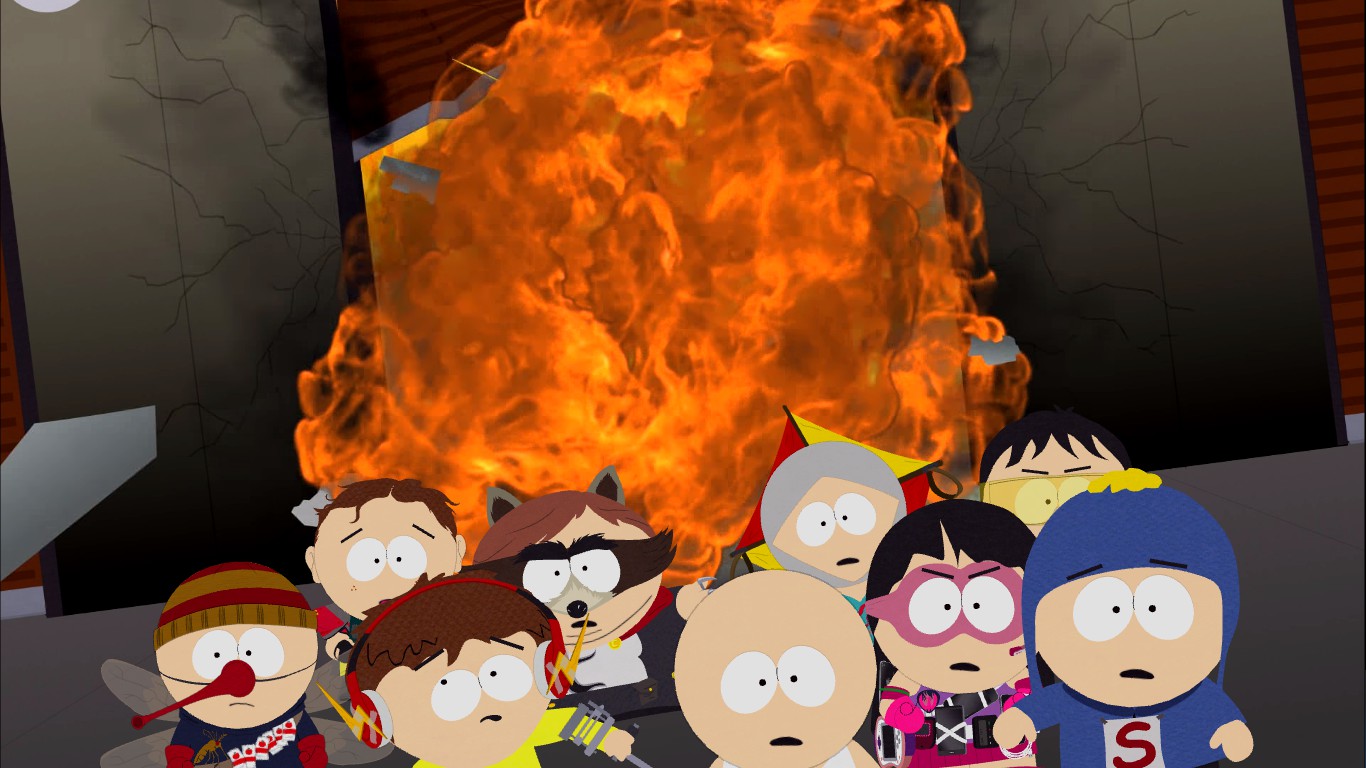
The New Kid alongside the other superheroes escaping the explosion from the warehouse.
You will be rewarded with the Filter Mask costume item upon victory.
When the battle has ended, a cut scene will play, where Call Girl will ask why is this being done. One of the defeated bums will say that this is being done to simply raise crime around South Park; he then proceeds to grab a cat and sniff it, getting knocked out while tipping over some chemicals which got lighted in the process. An explosion then occurs; the superheroes quickly make their escape.
Once the cut scene ends, proceed to the right end, where there will be a warehouse door protected by a passcode security system (similar to the one in Cartman's House). Call Girl will then hack it, the passcode will be revealed to be 0-1-2-3-4-5-6-7 (all saying Chaos in different voice tones). Input the passcode to unlock the warehouse door and make your way through.
You will be inside the warehouse (apparently Professor Chaos' personal lair), whereby there will be a group of Chaos minions blocking the way together with four baseball turrets. To get the advantage, first open Inspection Mode and scan the pipe hole at the left, then use your Sandblaster ability afterwards. A box of fireworks will drop next to the Chaos minions. Explode the box by throwing Snap N Pops and a fart to it, it will destroy half of the baseball turrets and stunning some of the minions. Proceed to punch the minions to engage them in combat.
Battle: Chaos Minions, again
As per previous battles, Toolshed is a locked party member. The initial batch of Chaos minions will be four Chaos Kids and two of the baseball turrets. Make use of Toolshed's Spiral Power to attack the Chaos Kids and the turrets at the same time if positioned properly. If Call Girl is selected into the party, make use of her Phone Destroyer to inflict Defense Down on the enemies, making them easier to be defeated. You can also use the turrets to your advantage, place the Chaos Kids in front of it; when the turn of the turrets arrive they will fire a ball that will smack the Chaos Kids for some damage (the turrets' attack will only hit the very first target in front of it).
Once the Chaos Kids has been defeated and the turrets destroyed, more Chaos Kids and two Chaos Dogs will appear on the left. Similar to the first batch, simply defeat them, making full use of Toolshed's Spiral Power and Call Girl's Phone Destroyer. After defeating some of them, a Mecha Minion will show up. It's best to use Call Girl's Blocked ability to distract the Mecha Minion, it will get Enraged and focus solely on Call Girl, also giving Call Girl a high defensive shield. You can use your other party members to attack the Mecha Minion. Defeat the Mecha Minion and destroy the turrets (if still not destroyed yet) to end the battle.
You will be rewarded with the Agonizer of Gaia artifact upon victory.
Professor Chaos Appears!
After the battle, make your way to the right of the warehouse, where there'll be a ladder to the roof blocked by a "lava" pile. Use Sandblaster to clear the "lava" pile, then climb up the ladder to proceed. Before heading up the ladder, loot the bag located next to a throne chair on the far right.
Upon climbing the ladder, you will be on the roof of the warehouse, where it is decorated with massive amounts of tinfoil. Toolshed will be seen looking at the scene in front of the warehouse, proceed to talk to him. A cut scene will play, whereby Toolshed expresses surprise on what is going on. Professor Chaos's voice will then be heard, congratulating on being able to make it this far while the rest of the group appears on the warehouse roof. Mosquito then proceeds to call Professor Chaos to come out and "fight like a man"; Professor Chaos will then make his physical appearance with his creation Mecha Minion Chaos Supreme; you will then be engaged in combat with it.
Battle: Mecha Minion Chaos Supreme
Professor Chaos showing up with his creation "Mecha Minion Chaos Supreme".
Just as with the previous battles, Toolshed will be a locked party member. Mecha Minion Chaos Supreme's will consist of three forms.
Phase 1: 10 Layer Chaos Supreme
The battle will start in his first form; this will be your first authentic supersized boss battle (not counting the Dragon), where the opponent occupies a bigger area of the battlefield, but also having a bigger hitbox. Professor Chaos will always have two actions each turn during combat. The first action being a telegraphed attack where he will fire missiles from his missile launchers, the missiles' attack will come on the next turn. The next attack will be shooting "lava" from the "middle section" of his creation, the "lava" will land on the ground in a 5-tile cross shape, damaging the center and causing Burning if any party members are in the affected area. Note that Mecha Minion Chaos Supreme is immune to almost all status effects except Defense Down, Shocked and Grossed Out. Call Girl will be of great use here, her Phone Destroyer ability will be able to land a hit to Mecha Minion Chaos Supreme from a distance away while applying Defense Down to it. During the "lava" attack, use Timefart Glitch to gain the upper hand, also try to stay clear of Mecha Minion Chaos Supreme's telegraphed missile attack. Inflict all of your party members' strongest attack to Mecha Minion Chaos Supreme; Captain Diabetes or The Coon is recommended as they have high health and relatively powerful abilities. Make use of Toolshed's Drillslinger to attack from a distance, also use his healing ability Revitotron-9000 to recover some health to your other party members if needed.
Once the first form of Mecha Minion Chaos Supreme is defeated, its bottom half will disintegrate, with the Chaos minions making it up fleeing the battlefield. Chaos Med Bots will then appear, assisting to heal Mecha Minion Chaos Supreme.
Phase 2: 5 Layer Chaos Supreme
Med Bots are there to heal Professor Chaos, and the heal is pretty large. The Chaos Supreme will lose its ability to fire Lava Piss, but will still have the power to fire missiles. Focus on the Chaos Med Bots first, as they have relatively low HP, their healing ability to Mecha Minion Chaos Supreme also will prolong the fight. Professor Chaos will also always have two actions each turn during combat, the first being the same telegraphed attack where he will fire missiles from his missile launchers, while the next attack will be a close range attack, slamming his "arm" to any party members within attacking distance, no attack will take place if no one stays beside him. Just like the first form, stick with the same strategy; using Call Girl's Phone Destroyer to inflict Defense Down and using your other party member's strongest attacks, also make use of Timefart Glitch when possible to cancel out Mecha Minion Chaos Supreme's attacks.
Once the second form of Mecha Minion Chaos Supreme is defeated, its top half will disintegrate, with the Chaos minions making it up fleeing the battlefield as well.
Final Phase: Mini Chaos Supreme
The third form will only have Mecha Minion Chaos Supreme's control unit left supported by two Chaos Dogs. Professor Chaos will also always have two actions turn during combat. In this form, Professor Chaos will have three abilities, including rushing through your team, spraying urine around to cause Grossed Out, and just bite with the dogs' mouth. Similar to the first two forms, stick with the same strategy; using Call Girl's Phone Destroyer to inflict Defense Down and using your other party member's strongest attacks, also make use of Timefart Glitch when possible to cancel out Mecha Minion Chaos Supreme's attacks.
Upon taking down the final form of Mecha Minion Chaos Supreme, the Chaos Dogs will proceed to flee while Professor Chaos will drop down defeated. You will be considered victorious in the battle, while being rewarded with the artifact Supreme Fist of Chaos and the Chaos Suit costume.
After the battle against Mecha Minion Chaos Supreme, a cut scene will play, where the superheroes (minus Call Girl) surround the defeated Professor Chaos. Human Kite then tried to shake him awake, with Super Craig claiming that he might be dead. However, The Coon then states that Professor Chaos isn't dead and proceeds to kick his head, waking him up. Then Coon then proceeds to detain him and bring him back to the Coon Lair. The superheroes then disperse, except The New Kid, Human Kite and Toolshed. Human Kite tries to convince Toolshed to rejoin Coon and Friends, however Toolshed declines and proceeds to leave the place.
真正的幕后黑手
Later, you will find yourself in the Coon Lair. Proceed down the stairs and head to your usual seat at the meeting table. A cut scene will then play, whereby Fastpass will ask if Professor Chaos's scheme is being backed by an adult. Professor Chaos, seen detained in the Coon Lair's then states that the backer is someone who is nameless, faceless and is able to change like the direction of wind in time. This startled The Coon, and Professor Chaos continues to explain the prophecies by his backer. As Chaos talks, The Coon thinks and then states that he knows who the backer of Professor Chaos's scheme is: Mitch Conner. Human Kite then retorts on The Coon's claim as being ridiculous, with The Coon proceeding to brief about Mitch Conner's backstory through the Coon Lair's iPad station. However, Human Kite is having none of this and proceeds to leave the Coon Lair for bed. The Coon then proceeds to ask the others to leave and head to bed to prepare for the next day, while he looks on to the iPad station on the mugshots of Mitch Conner.
On the next day in-game, another cut scene will play, whereby it will the South Park Morning News, displaying news relating to the events of the mission. After the morning news, the scene will then shift to South Park Elementary, whereby The New Kid is seen leaving the school but is caught up by Call Girl (as Wendy). She then proceeds to ask The New Kid to meet her at the playground bathrooms. She will then make her way and wave goodbye to The New Kid; the mission will be then complete.
冷知识
- 完整破碎早期的时候,在击败毒品制造员们之后会收获眼部装扮过滤面罩(Filter Mask),但在这之后的一次更新中,这一奖励被移除了。
- 在更后来的更新中,该奖励再次出现,但被改成了头部服装。
- 南园南公寓的二楼在本任务中有一个隐形的风车,扫描出来之后提示位置也会在二楼。
- 最早的锅炉谜题成功的触发判定不是获取任何物品,而是混沌教授打来的嘲笑通话。
- 浣熊侠在工具侠面对岩浆无计可施的时候表示“这又不是塞尔达传说”,这是在调侃塞尔达系列道具的局限性,许多的能力都只能在特定条件下使用,在别的地方基本无法使用。
- 在无序将军的战斗中,显示屏上的混沌教授会在白色反光和黑色反光的头盔中变换,似乎是一种游戏内的贴图问题。
- 不会攻击的混沌小孩们在任务中会不停在屋顶上监视新小孩的路程,用摔炮、屁攻击或者只是靠近都会让他们把头缩回去。
| 南方公园:完整破碎 | ||
|---|---|---|
| 概览 | 玩法 • 角色 • 图册 • 任务 • 可收集品 • 拓展包 • 成就 | |
| 角色 | 主角 | 新来的 |
| 浣熊侠联盟 | 浣熊侠 • 风筝侠 • 速行侠 • 超级克雷格 • 蚊子侠 • 糖尿病队长 | |
| 自由伙伴 | 提莫希博士 • 神秘侠 • 工具侠 • 神奇特维克 • 保鲜盒侠 | |
| 中立队友 | 电话女侠 • 亨利埃塔·毕格 • 薄荷浆果酥侠 • 圣诞老人 | |
| 反派 | 混沌教授 • 无序将军 • 米奇·康纳 • 莎布·尼古拉丝 • 大师吸血鬼 • 科里·海姆 • 敏西 • 内森 • 扎咖诺 | |
| 可召唤角色 | 杰拉德·布罗夫洛夫斯基 • 金博·克恩和内德·格布兰斯基 • 克拉希 • 摩西 | |
| 职业 | 蛮兽 • 极速者 • 爆能士 • 生化人 • 元素使 • 灵能师 • 机巧匠 • 刺客 • 植物领主 • 武术家 • 幽冥族 • 最终女孩 | |
| 机制 | 神器(神器列表) • 状态影响 • 浣熊墙(浣熊墙好友) • 服装(服装列表) | |
| 主线任务 | 第一天 | 酷帕国之战 | 起源故事 | 浣熊墙启动 | 平行宇宙相撞 • 超级克雷格的羁绊 | 浣熊伙伴的诞生 | 四年仔崛起 | 必须快一点 • 蜜糖罐中蚊子侠 • 一触信仰 • 知心畅谈 • 行动:正当合法 • 玉米卷低语者 | 起源故事2:新的开始 | 内战 | 返乡义务 | 凶兽之腹 |
| 第二天 | “克拉希”机密 | 平行宇宙再相撞 • 药炸危机 | 微侵略学院 • 知心畅谈2:性别确定 • 行动:盲目的正义 | 起源故事3:天外来客 | 内战2:玩乐结束 | 种族学院:第一课 | 工具需求 | 卧床在底 | 混沌百手 | |
| 第三天 | 混沌诡计 • 约谈邀请函 | 学雷锋议程 | 起源故事4:终极序章 | 黑夜从命 | 纤细白线 | |
| 第四天 | 自由召唤 | 抓住一只浣熊侠 | 莫费斯托博士的屁股们 | 屁转未来 | 英雄巡逻中 | |
| 某一天 | 英雄巡逻中 | 向家前进 | |
| 支线任务 | 葡萄干大暴走 • 神气的困境 | 烂底之谜 | 为尼波霸力而战 |义警行销 • 大型肉搏战 | 在混沌上下注 | 幽灵调解人 • 疗心战役 | 薄荷河马的失物招领 | (你可以)打给我 | 一触及天 | |
| 寻宝游戏 | 寻宝游戏:大基佬阿尔的大基猫 | 寻宝游戏:大头贴活计 | 寻宝游戏:耽美工程(耽美画作列表) | |
| 拓展挑战 | 危险甲板 | 拓展挑战:从黄昏到丽家 | 拓展挑战:爽脆降临 • 拓展挑战:荣誉徽章 | |